Sau khi plugin yêu thích của tôi là GenerateBlocks cập nhật phiên bản mới, nó ngay lập tức bị xung đột với một plugin tạo mục lục WordPress mà tôi đã sử dụng nhiều năm qua — Fixed TOC.
Đứng giữa lựa chọn phải bỏ đi plugin nào, đó là khó khăn với tôi vì tôi đã dành nhiều thời gian để tùy biến và chúng đều là những plugin hữu ích.
Cuối cùng, tôi cũng phải đưa ra quyết định đó là tìm giải pháp thế cho Fixed TOC.
Trong hướng dẫn này, tôi sẽ chỉ cho bạn cách thêm mục lục được tạo tự động vào trang web WordPress của bạn với một vài bước nhanh chóng.
1. Tocbot là gì?
Ngay từ tiêu đề bài đăng, bạn có thể sẽ tò mò muốn biết nó là gì?
Tocbot là một thư viện JavaScript (JS) giúp tạo mục lục (table of contents – TOC) từ các tiêu đề trong tài liệu HTML.
Thư viện này sử dụng các phương thức DOM và tránh các phụ thuộc giao diện người dùng jQuery & jQuery. Nếu bạn là người dùng WordPress nâng cao, bạn biết rằng điều này thực sự là điểm cộng lớn.
Tocbot bao gồm các tính năng:
- Tìm ra tiêu đề của bài đăng (như h2)
- Tạo liên kết đến các phần đó
- Cho người đọc biết vị trí của họ trên trang
Nó có vẻ đơn giản nhưng đây là những thứ mà tôi cần cho một mục lục.
Trong hướng dẫn này, tôi sẽ sử dụng chủ đề GeneratePress nhưng các bước dưới đây áp dụng cho bất kỳ chủ đề WordPress nào.
2. Cách tạo mục lục
Có một sự khác biệt trong cách người dùng trải nghiệm mục trên trang web của tôi:
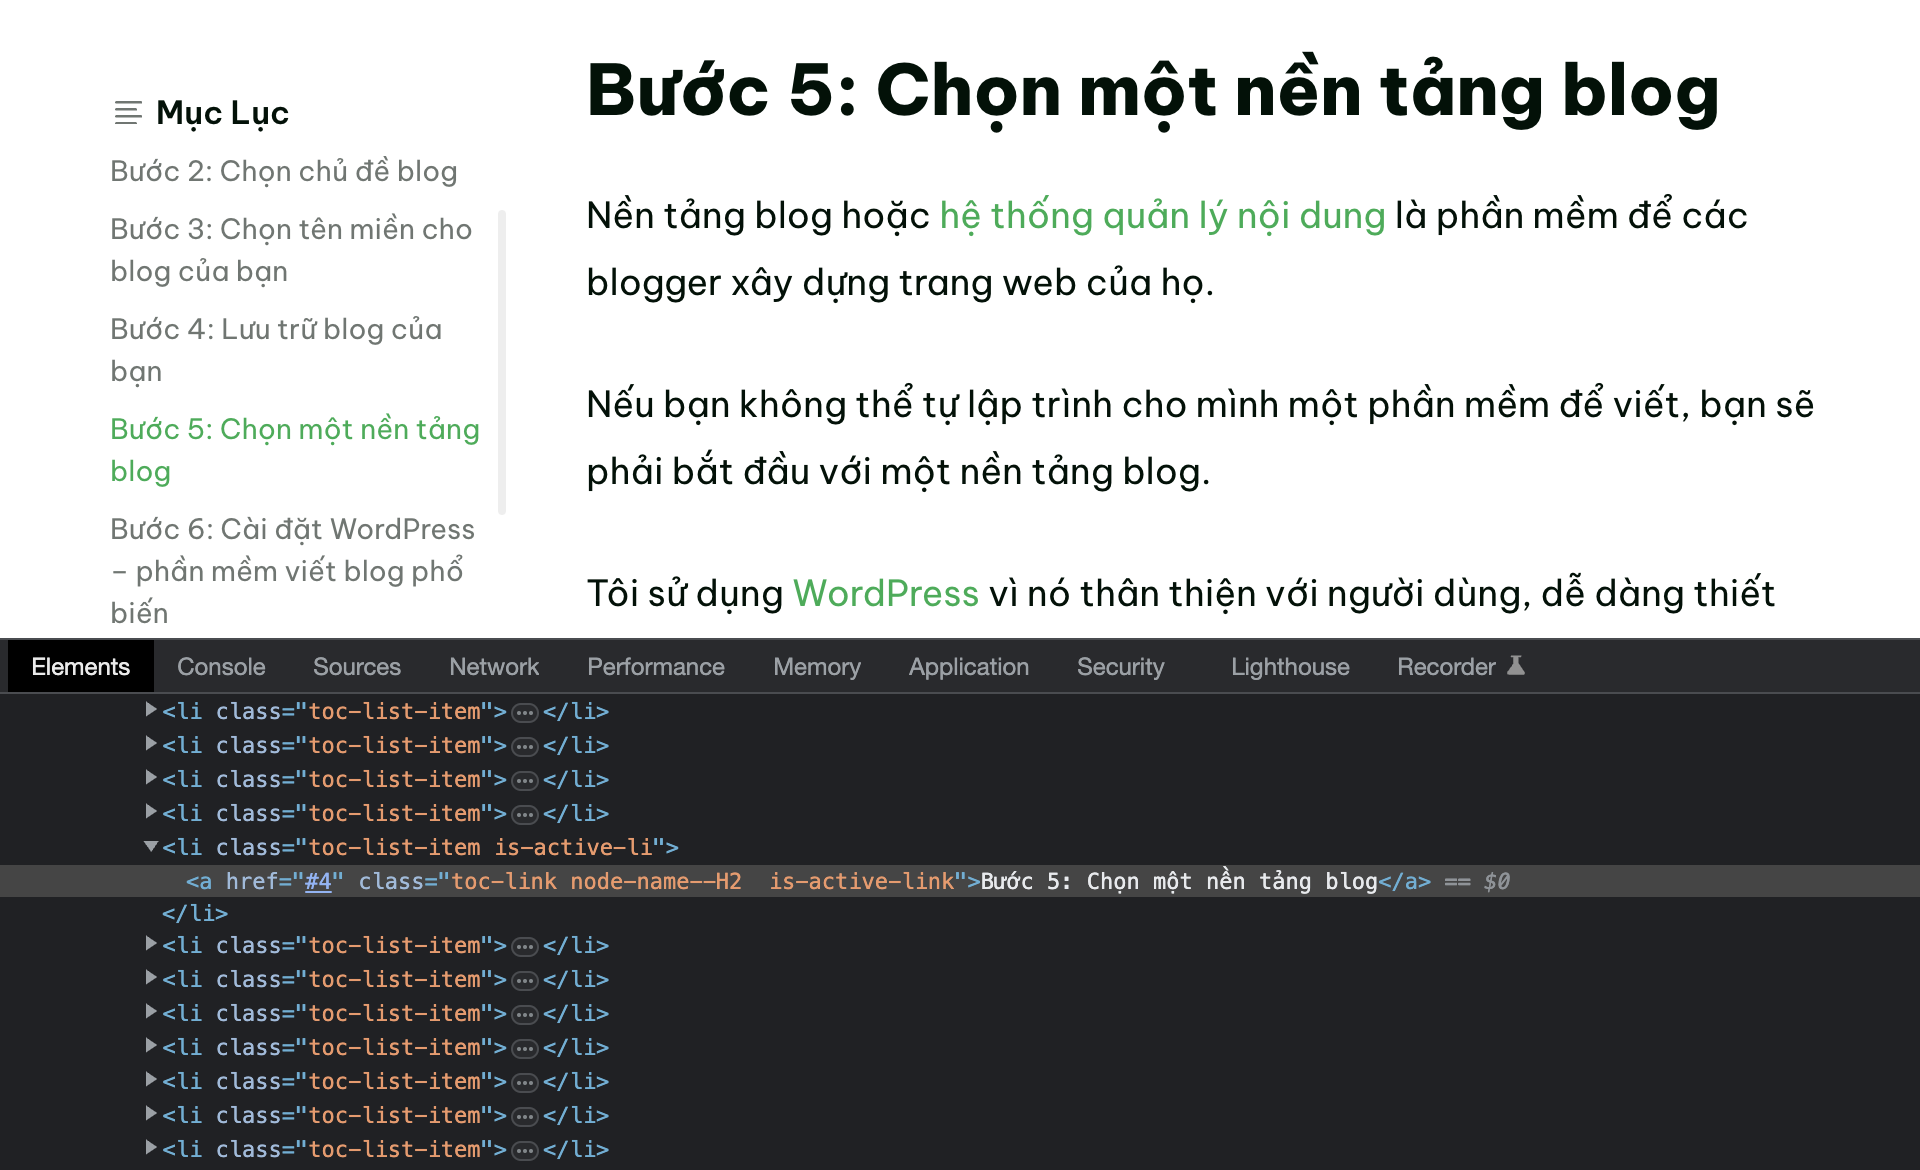
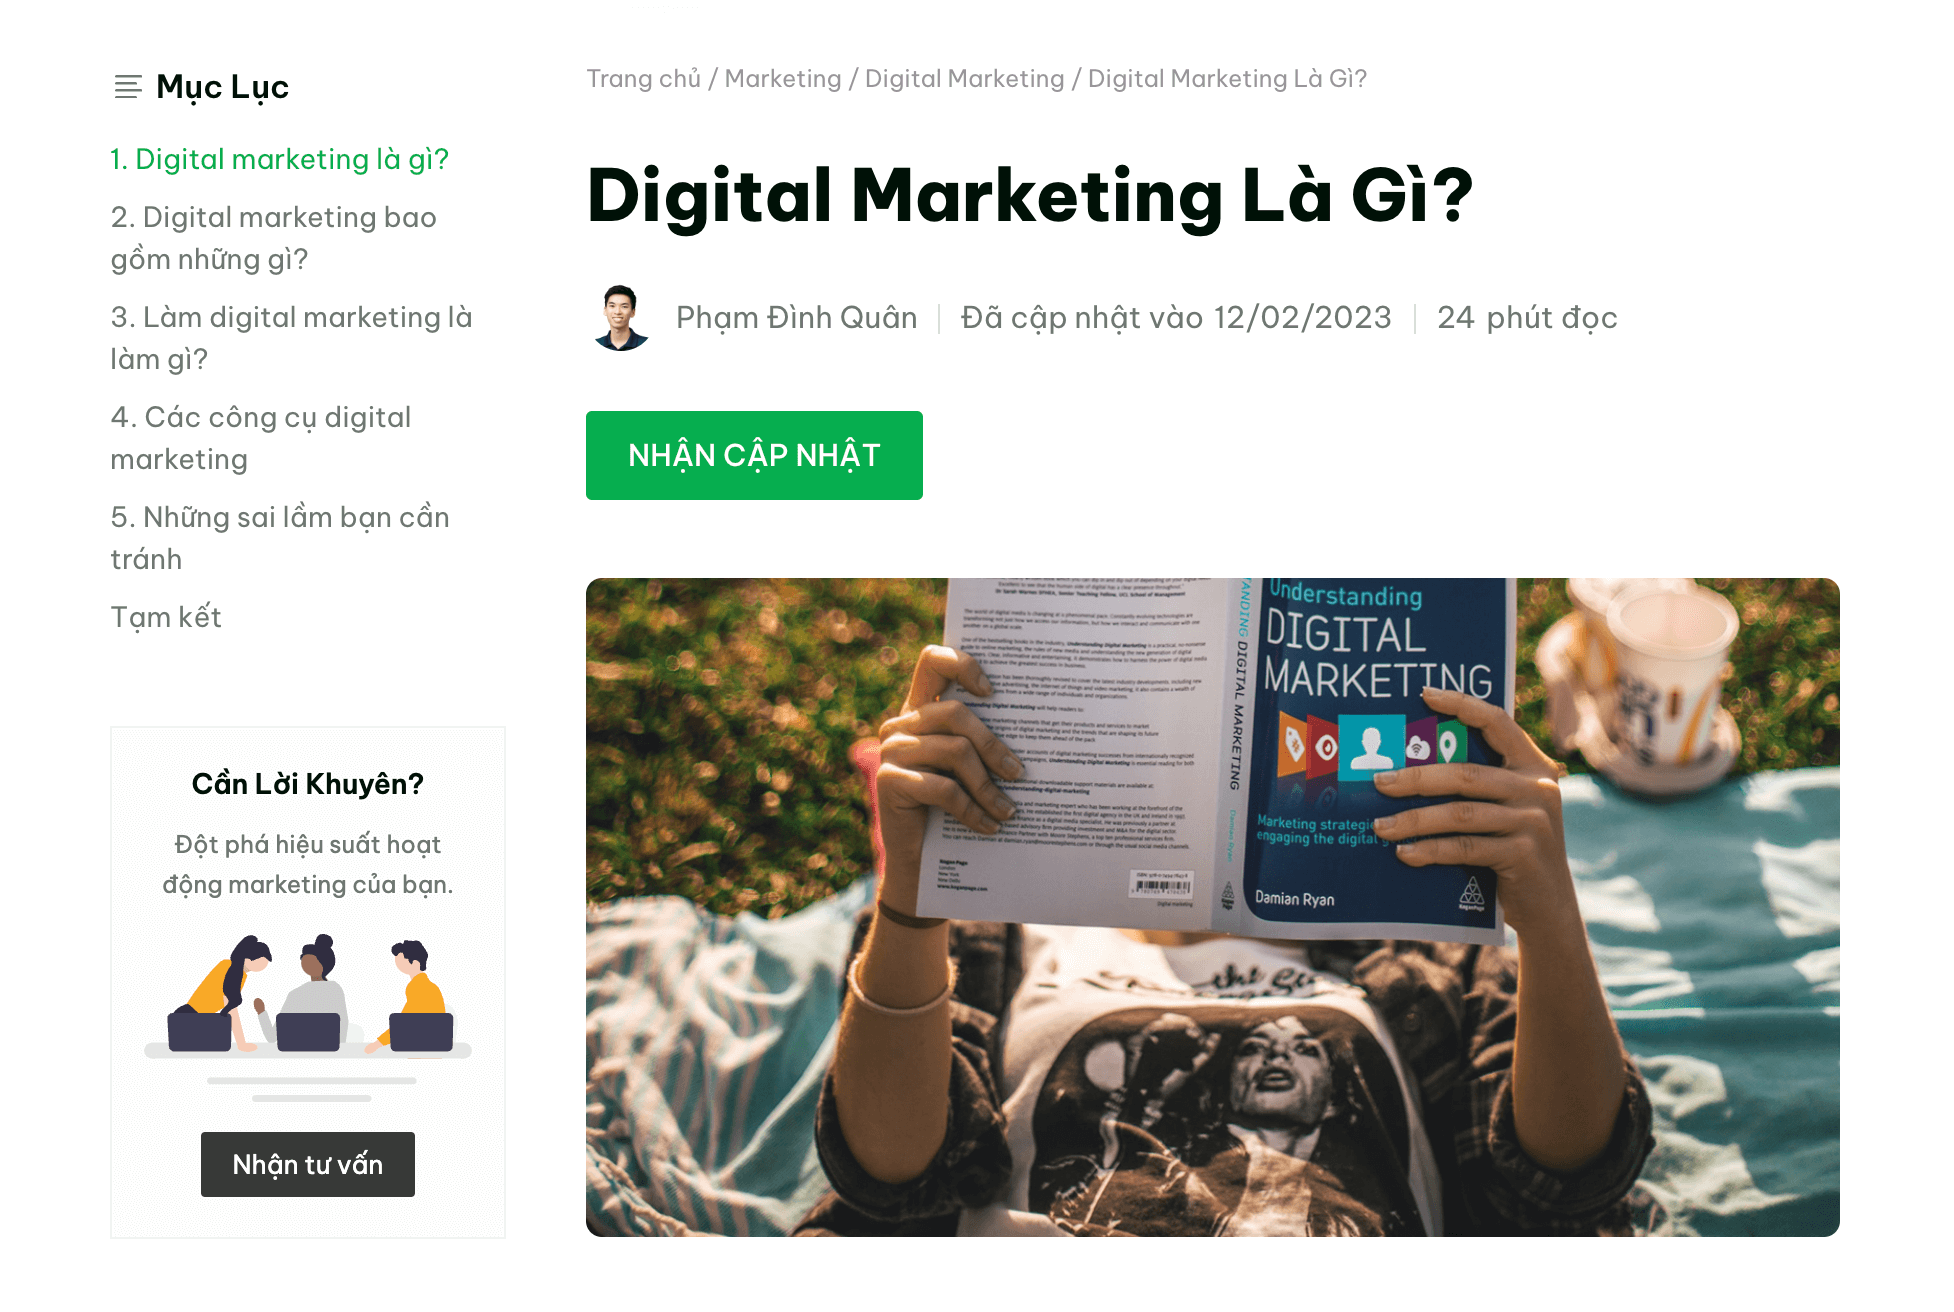
- Với giao diện máy tính, tôi đặt mục lục ở bên lề trái bài đăng
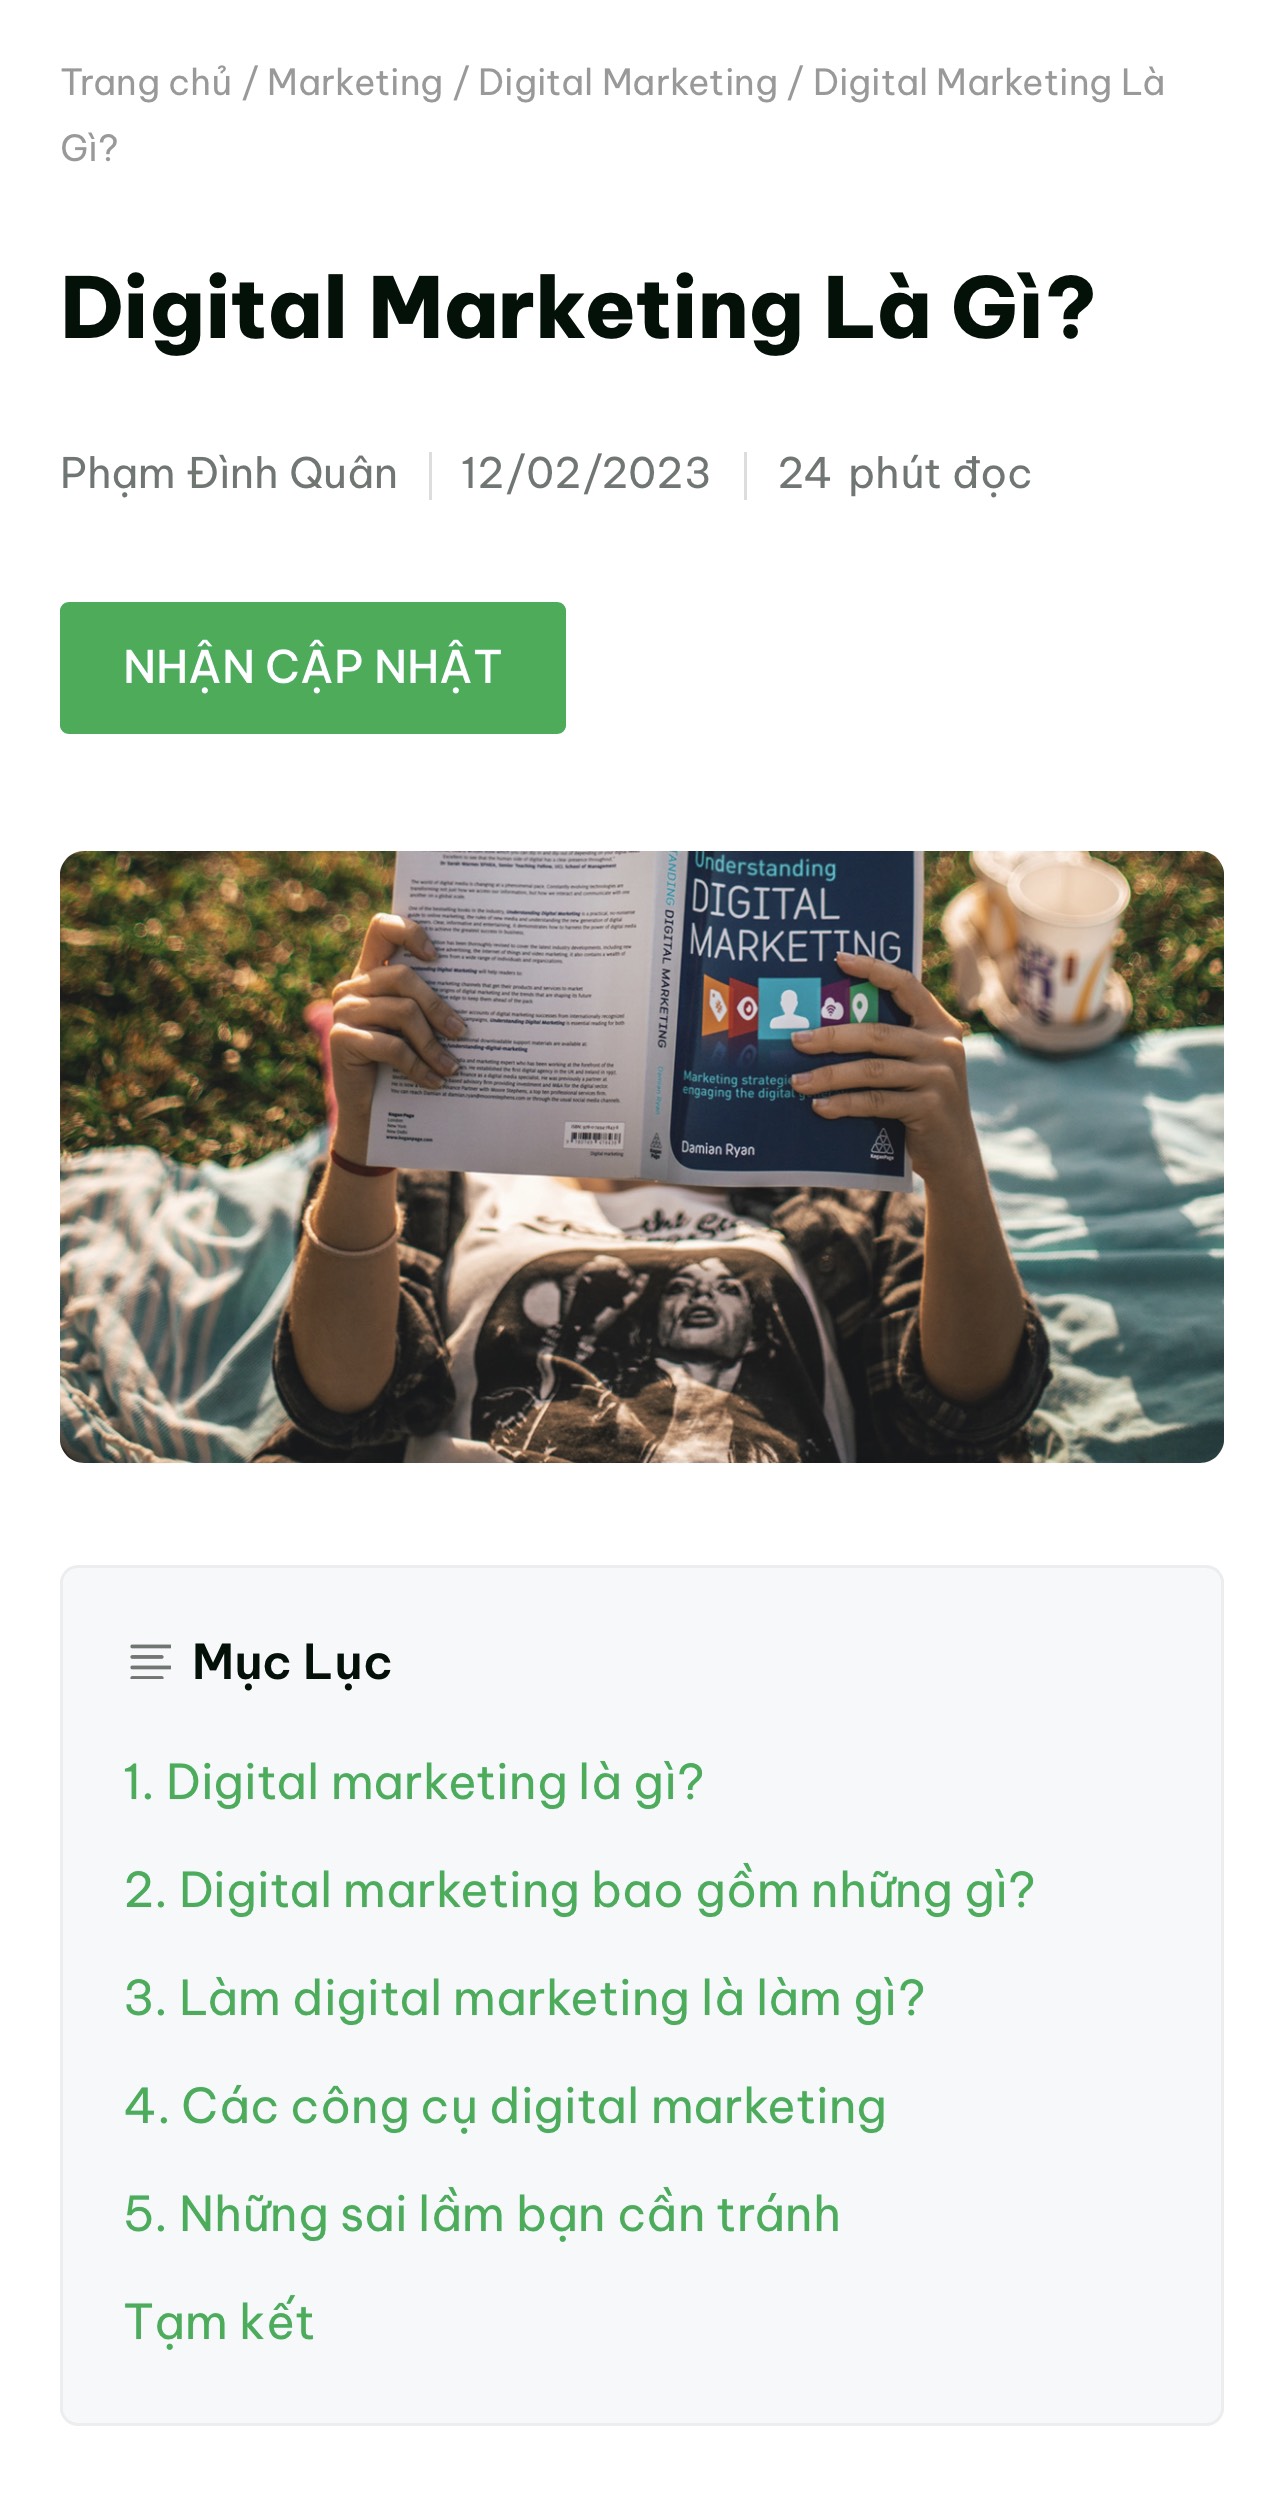
- Với giao diện điện thoại, tôi đặt mục lục trong phần đầu nội dung bài đăng
Để hiển thị mục lục, bạn cần thêm 3 loại mã bao gồm JS, CSS, HTML.
Thêm JS
Bạn cài đặt một plugin WordPress tên là WPCode. Nó có thể giúp bạn chèn các đoạn mã vào bất cứ đâu mà bạn muốn.
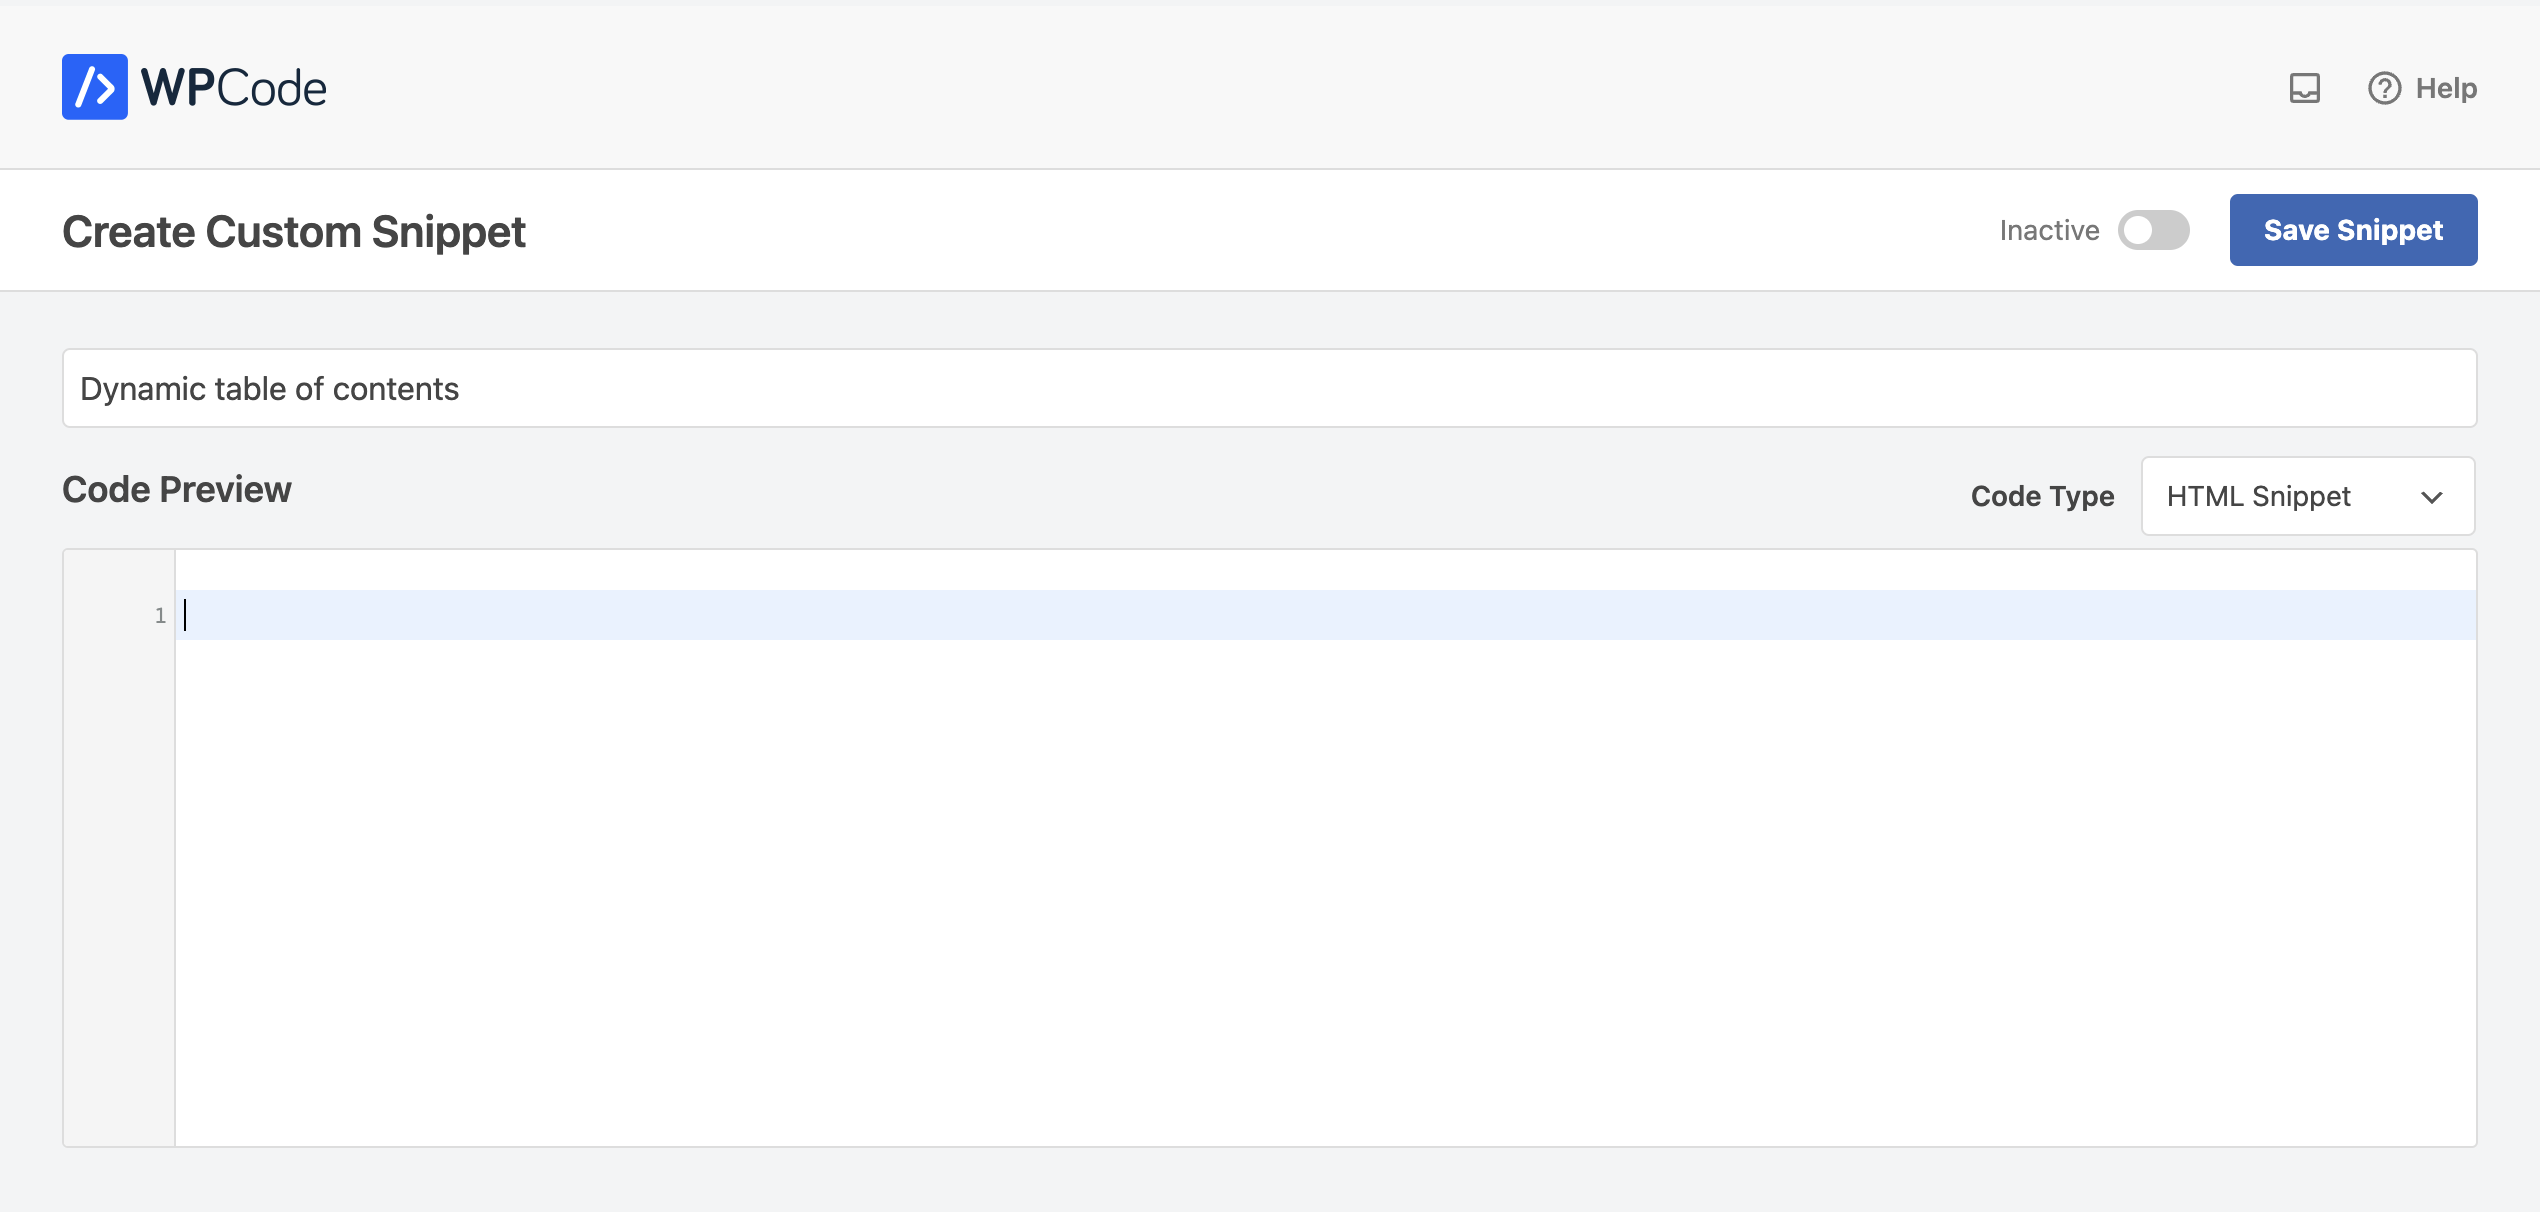
Trong phần Code Preview, bạn thêm tập lệnh JS:
<script src="https://cdnjs.cloudflare.com/ajax/libs/tocbot/4.20.1/tocbot.min.js"></script>Tại thời điểm viết bài, Tocbot đang ở phiên bản 4.20.1. Khi cài đặt nó trên trang web của bạn, hãy sử dụng phiên bản mới nhất bằng cách cập nhật số phiên bản trong các URL.
Sau khi thêm tập lệnh, bạn cần khởi tạo nó để Tocbot biết vị trí trên bài đăng mà bạn muốn có mục lục và những gì bạn muốn thêm vào đó.
Thêm các dòng mã này ngay tập lệnh JS ở trên:
<script>
window.addEventListener('load', (event) => {
 document.querySelectorAll('h2').forEach(function(el, i) {
    el.id = i
  })
tocbot.init({
// Where to render the table of contents.
tocSelector: '.toc',
// Where to grab the headings to build the table of contents.
contentSelector: '.content-area',
// Which headings to grab inside of the contentSelector element.
headingSelector: 'h2',
// For headings inside relative or absolute positioned containers within content.
hasInnerContainers: true,
// Headings offset between the headings and the top of the document (this is meant for minor adjustments).
headingsOffset: 40,
// Smooth scroll offset.
scrollSmoothOffset: -40,
  });
});
</script>.toclà nơi bạn muốn mục lục được hiển thị.content-arealà vùng nội dung bạn muốn Tocbot tìm kiếm các thẻ tiêu đề
Thêm CSS
Mặc dù Tocbot có thư viện CSS nhưng tôi không sử dụng theo cách đó. Tôi muốn tùy chỉnh CSS theo nhu cầu của mình.
Nếu bạn muốn hiển thị mục lục trông giống như trên các bài đăng của BetterGrowth, bạn có thể thêm CSS của tôi vào sau các đoạn mã ở trên:
<style>
@media screen and (min-width: 1024px) {
.inside-left-sidebar {
display: flex;
flex-direction: column;
max-height: calc(100vh - 80px);
position: sticky;
top: 50px;
}
.toc>.toc-list li {
list-style: none;
margin-right: 5px;
}
.toc-list {
max-height: 320px;
overflow-y: scroll;
}
.toc-list::-webkit-scrollbar {
width: 4px;
background: 0;
}
.toc-list::-webkit-scrollbar-thumb {
background: #eeeeee;
border-radius: 8px;
}
#bg-toc
.is-active-link {
color: #00AE4F !important;
}
#bg-toc
a.toc-link {
padding: 4px 0;
display: block;
line-height: 1.5;
font-size: 14px;
overflow: hidden;
color: #6f7672;
-webkit-transition: all .33s ease-out;
-moz-transition: all .33s ease-out;
-o-transition: all .33s ease-out;
transition: all .33s ease-out;
}
#bg-toc
a.toc-link:hover {
color: #001107;
}
.post-navigation-left .nav-title {
font-style: normal;
font-weight: 600;
font-size: 16px;
line-height: 24px;
color: #001107;
padding: 0 0 10px 0;
}
.post-navigation-left .nav-title:before {
content: url(data:image/svg+xml,%3Csvg%20xmlns%3D%22http%3A%2F%2Fwww.w3.org%2F2000%2Fsvg%22%20width%3D%2216%22%20height%3D%2214%22%20viewBox%3D%220%200%2020%2020%22%20fill%3D%22none%22%20stroke%3D%22%236f7672%22%20stroke-width%3D%221.8%22%20stroke-linecap%3D%22round%22%20stroke-linejoin%3D%22round%22%3E%3Cpath%20d%3D%22M17%209.5H3M21%204.5H3M21%2014.5H3M17%2019.5H3%22%2F%3E%3C%2Fsvg%3E);
padding-right: 7px;
}
}
@media screen and (max-width: 768px) {
#bg-toc-mobile {
padding: 20px 20px 15px;
background: #F7F9FA;
border-radius: 6px;
margin-bottom: 1.5em;
border: 1px solid rgb(0 34 15 / 5%);
}
#bg-toc-mobile
.toc>.toc-list li {
list-style: none;
margin-right: 5px;
margin-bottom: 0 !important;
}
#bg-toc-mobile
.toc-list {
max-height: 300px;
overflow-y: scroll;
}
#bg-toc-mobile
ol.toc-list {
margin: 0 !important;
}
#bg-toc-mobile
.toc-list::-webkit-scrollbar {
width: 4px;
background: 0;
}
#bg-toc-mobile
.toc-list::-webkit-scrollbar-thumb {
background: #a1a6a3;
border-radius: 8px;
}
#bg-toc-mobile
a.toc-link {
padding: 5px 0;
display: block;
line-height: 1.65;
font-size: 16px;
overflow: hidden;
color: #00AE4F;
-webkit-transition: all .33s ease-out;
-moz-transition: all .33s ease-out;
-o-transition: all .33s ease-out;
transition: all .33s ease-out;
}
#bg-toc-mobile
a.toc-link:hover {
color: #00AE4F;
}
.post-navigation-inline .nav-title {
font-style: normal;
font-weight: 600;
font-size: 16px;
line-height: 24px;
color: #001107;
padding-bottom: 10px;
}
.post-navigation-inline .nav-title:before {
content: url(data:image/svg+xml,%3Csvg%20xmlns%3D%22http%3A%2F%2Fwww.w3.org%2F2000%2Fsvg%22%20width%3D%2216%22%20height%3D%2214%22%20viewBox%3D%220%200%2020%2020%22%20fill%3D%22none%22%20stroke%3D%22%236f7672%22%20stroke-width%3D%221.8%22%20stroke-linecap%3D%22round%22%20stroke-linejoin%3D%22round%22%3E%3Cpath%20d%3D%22M17%209.5H3M21%204.5H3M21%2014.5H3M17%2019.5H3%22%2F%3E%3C%2Fsvg%3E);
padding-right: 7px;
}
}
</style>
Trong trường hợp bạn muốn sử dụng CSS mặc định của Tocbot, bạn có thể thêm tệp lệnh thay cho đoạn mã CSS của tôi ở trên:
<link rel="stylesheet" href="https://cdnjs.cloudflare.com/ajax/libs/tocbot/4.20.1/tocbot.css">Nếu bạn muốn tùy chỉnh CSS của riêng bạn dựa trên CSS ban đầu của Tocbot, bạn có thể truy cập vào liên kết CSS của Tocbot ở trên và sử dụng trình hủy rút gọn CSS.
Tóm lại, đây là những gì bạn cần thêm vào phần Code Preview:
<script src="https://cdnjs.cloudflare.com/ajax/libs/tocbot/4.20.1/tocbot.min.js"></script>
<script>
window.addEventListener('load', (event) => {
 document.querySelectorAll('h2').forEach(function(el, i) {
    el.id = i
  })
tocbot.init({
// Where to render the table of contents.
tocSelector: '.toc',
// Where to grab the headings to build the table of contents.
contentSelector: '.content-area',
// Which headings to grab inside of the contentSelector element.
headingSelector: 'h2',
// For headings inside relative or absolute positioned containers within content.
hasInnerContainers: true,
// Headings offset between the headings and the top of the document (this is meant for minor adjustments).
headingsOffset: 40,
// Smooth scroll offset.
scrollSmoothOffset: -40,
  });
});
</script>
<style>
@media screen and (min-width: 1024px) {
.inside-left-sidebar {
display: flex;
flex-direction: column;
max-height: calc(100vh - 80px);
position: sticky;
top: 50px;
}
.toc>.toc-list li {
list-style: none;
margin-right: 5px;
}
.toc-list {
max-height: 320px;
overflow-y: scroll;
}
.toc-list::-webkit-scrollbar {
width: 4px;
background: 0;
}
.toc-list::-webkit-scrollbar-thumb {
background: #eeeeee;
border-radius: 8px;
}
#bg-toc
.is-active-link {
color: #00AE4F !important;
}
#bg-toc
a.toc-link {
padding: 4px 0;
display: block;
line-height: 1.5;
font-size: 14px;
overflow: hidden;
color: #6f7672;
-webkit-transition: all .33s ease-out;
-moz-transition: all .33s ease-out;
-o-transition: all .33s ease-out;
transition: all .33s ease-out;
}
#bg-toc
a.toc-link:hover {
color: #001107;
}
.post-navigation-left .nav-title {
font-style: normal;
font-weight: 600;
font-size: 16px;
line-height: 24px;
color: #001107;
padding: 0 0 10px 0;
}
.post-navigation-left .nav-title:before {
content: url(data:image/svg+xml,%3Csvg%20xmlns%3D%22http%3A%2F%2Fwww.w3.org%2F2000%2Fsvg%22%20width%3D%2216%22%20height%3D%2214%22%20viewBox%3D%220%200%2020%2020%22%20fill%3D%22none%22%20stroke%3D%22%236f7672%22%20stroke-width%3D%221.8%22%20stroke-linecap%3D%22round%22%20stroke-linejoin%3D%22round%22%3E%3Cpath%20d%3D%22M17%209.5H3M21%204.5H3M21%2014.5H3M17%2019.5H3%22%2F%3E%3C%2Fsvg%3E);
padding-right: 7px;
}
}
@media screen and (max-width: 768px) {
#bg-toc-mobile {
padding: 20px 20px 15px;
background: #F7F9FA;
border-radius: 6px;
margin-bottom: 1.5em;
border: 1px solid rgb(0 34 15 / 5%);
}
#bg-toc-mobile
.toc>.toc-list li {
list-style: none;
margin-right: 5px;
margin-bottom: 0 !important;
}
#bg-toc-mobile
.toc-list {
max-height: 300px;
overflow-y: scroll;
}
#bg-toc-mobile
ol.toc-list {
margin: 0 !important;
}
#bg-toc-mobile
.toc-list::-webkit-scrollbar {
width: 4px;
background: 0;
}
#bg-toc-mobile
.toc-list::-webkit-scrollbar-thumb {
background: #a1a6a3;
border-radius: 8px;
}
#bg-toc-mobile
a.toc-link {
padding: 5px 0;
display: block;
line-height: 1.65;
font-size: 16px;
overflow: hidden;
color: #00AE4F;
-webkit-transition: all .33s ease-out;
-moz-transition: all .33s ease-out;
-o-transition: all .33s ease-out;
transition: all .33s ease-out;
}
#bg-toc-mobile
a.toc-link:hover {
color: #00AE4F;
}
.post-navigation-inline .nav-title {
font-style: normal;
font-weight: 600;
font-size: 16px;
line-height: 24px;
color: #001107;
padding-bottom: 10px;
}
.post-navigation-inline .nav-title:before {
content: url(data:image/svg+xml,%3Csvg%20xmlns%3D%22http%3A%2F%2Fwww.w3.org%2F2000%2Fsvg%22%20width%3D%2216%22%20height%3D%2214%22%20viewBox%3D%220%200%2020%2020%22%20fill%3D%22none%22%20stroke%3D%22%236f7672%22%20stroke-width%3D%221.8%22%20stroke-linecap%3D%22round%22%20stroke-linejoin%3D%22round%22%3E%3Cpath%20d%3D%22M17%209.5H3M21%204.5H3M21%2014.5H3M17%2019.5H3%22%2F%3E%3C%2Fsvg%3E);
padding-right: 7px;
}
}
</style>
Thêm HTML
Bằng cách thêm HTML, bạn xác định vị trí mục lục được hiển thị trong bài đăng của mình.
Như đã đề cập ở trên, tôi đặt mục lục ở bên lề trái bài đăng trong giao diện máy tính. Vì vậy, những gì tôi làm là thêm đoạn mã HTML này vào thanh bên trái.
<div class="post-navigation-left" id="bg-toc">
<div class="nav-title" style="display: block;">Mục Lục</div>
<div class="toc"></div>
</div>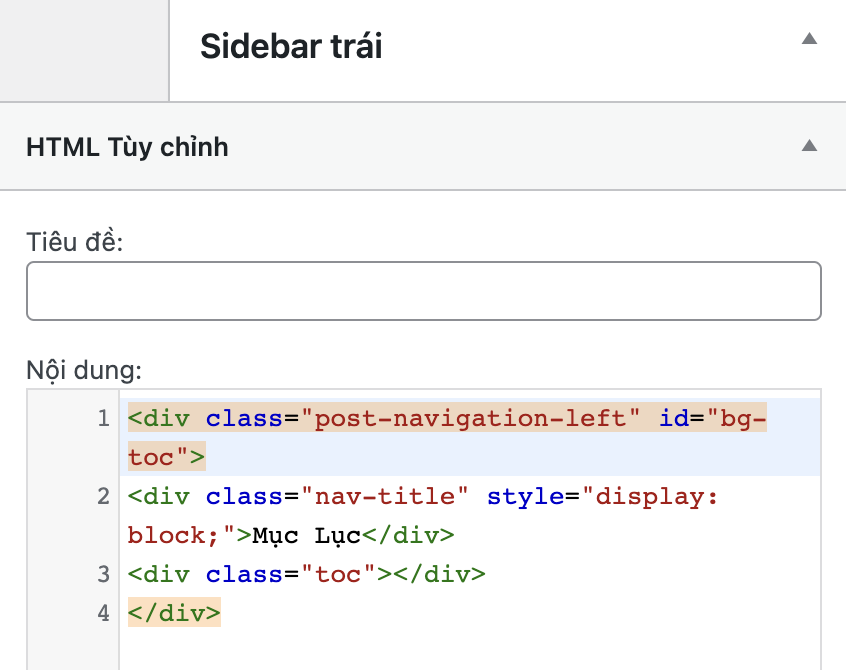
Đối với giao diện điện thoại, tôi tạo một Snippet mới trong WPCode và thêm đoạn mã HTML này vào phần Code Preview.
<div class="post-navigation-inline" id="bg-toc-mobile">
<div class="nav-title" style="display: block;">Mục Lục</div>
<div class="toc"></div>
</div>
Sau đó, bạn chọn vị trí hiển thị mục lục trên giao diện điện thoại bằng cách thiết lập trong phần Insertion.

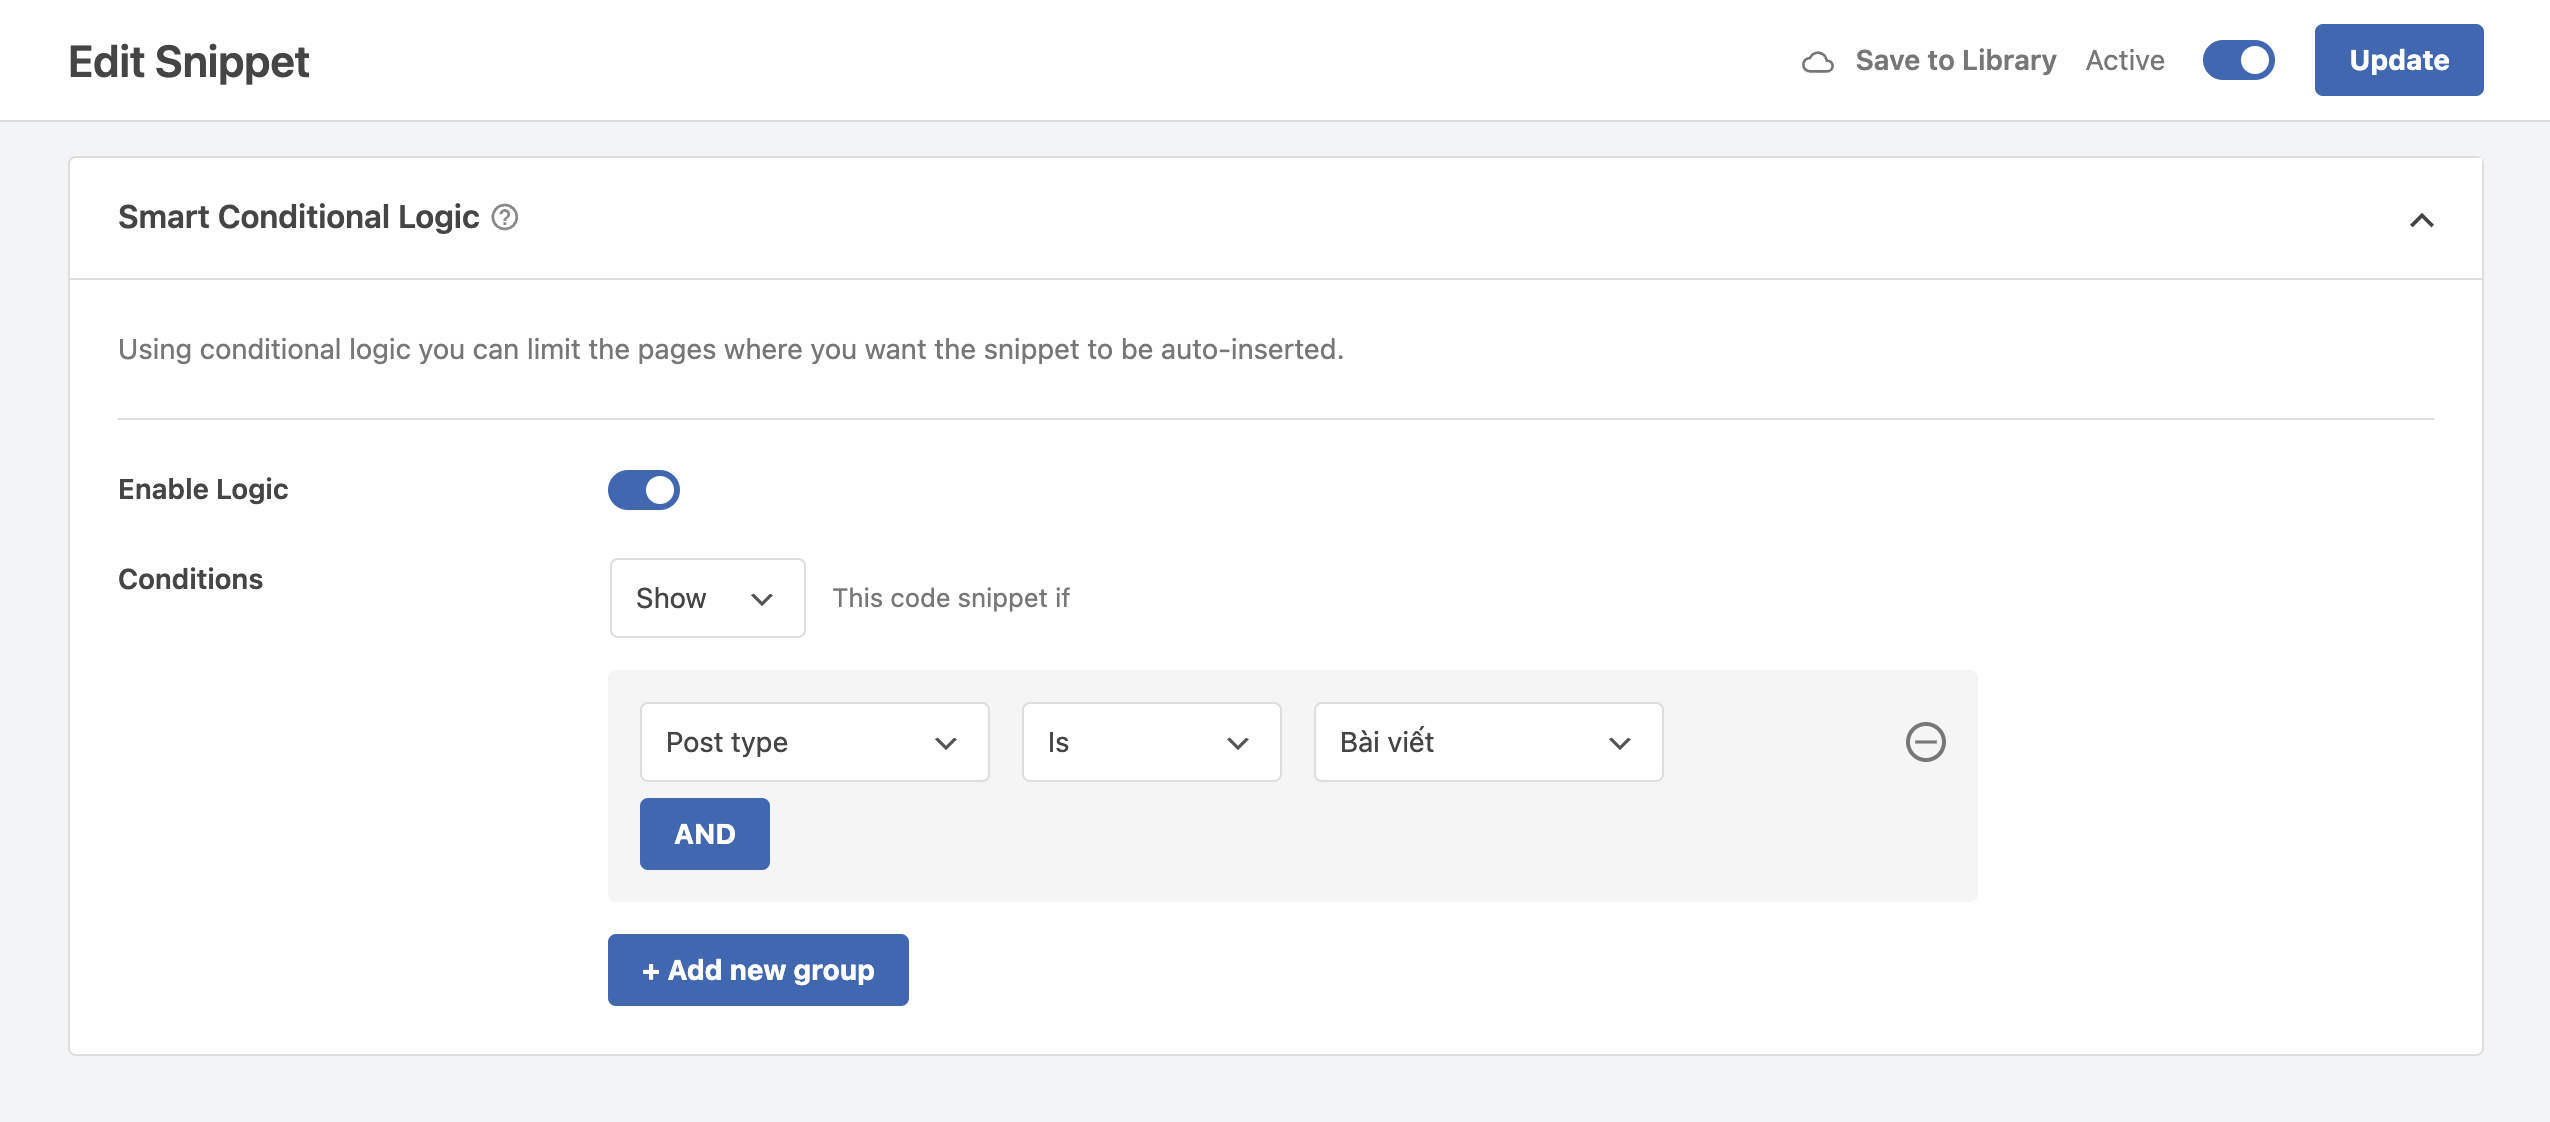
Để các đoạn mã JS, CSS chỉ được tải và mục lục chỉ được hiển thị trong các bài viết, bạn cần thiết lập điều kiện trong phần Smart Conditional Logic cho cả hai Snippet mà bạn đã tạo trong WPCode.
Hướng dẫn này có hữu ích với bạn không? Nếu bạn áp dụng hiệu quả, bạn hãy để lại bình luận bên dưới. Tôi rất vui nếu nó có ý nghĩa.